Why Is My Coffee Maker Leaking Water From The Bottom?
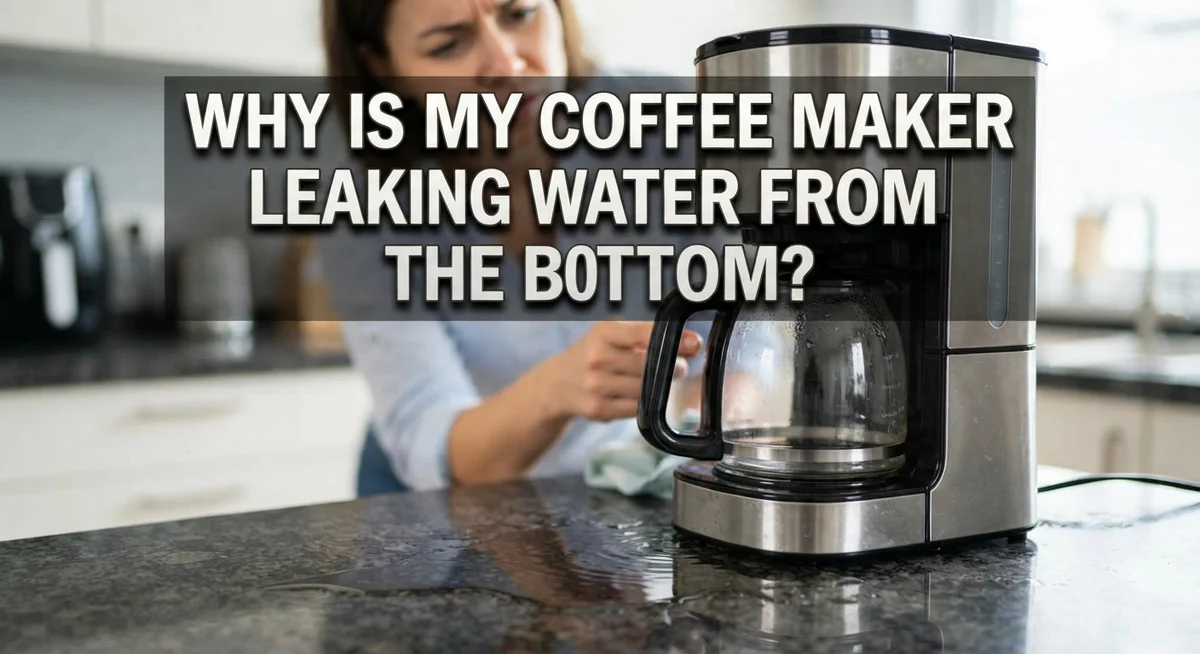
A puddle under your coffee maker can ruin your morning fast. You go to make coffee, and instead you find water pooling on the counter. It feels frustrating, especially when you just want your daily cup.
The good news? This problem is often easier to fix than you think. Many leaks happen because of small issues like a misaligned brew basket or a loose hose connection. Sometimes the water reservoir is cracked or sitting incorrectly.
In this guide, we will walk through the most common reasons your coffee maker leaks from the bottom. You will learn how clogs, overflows, and pump issues can cause water to escape.
We will also cover simple troubleshooting steps you can try at home. From checking your water levels to running a quick descaling cycle, these fixes are easy to follow.
By the end, you will understand why leaks happen and how to stop them. You might not need a repair or a new machine at all. Let’s find out what is really going on underneath your coffee maker.
In a Nutshell
Here is a quick summary before we dive deeper into details.
-
Check the water reservoir first. Cracks or loose fits often cause leaks that look like they come from the bottom.
-
Look at the drip tray. A misaligned or damaged tray can let water escape onto your counter.
-
Inspect the brew basket. If it sits wrong, water spills instead of flowing into your cup.
-
Clogs cause pressure buildup. This forces water out through weak points in the machine.
-
Overfilling is a common mistake. Too much water in the reservoir leads to overflow that mimics a bottom leak.
-
Most leaks are fixable. You rarely need a new machine. A little cleaning or realignment often solves the issue.
-
Unplug your machine before checking anything. This keeps you safe while you inspect parts.
Once you understand these basics, you can move on to the deeper causes and fixes below.
How Your Coffee Maker’s Water System Works
Your coffee maker has a simple water system that moves water from the reservoir through internal tubes to the heating chamber and brew basket. Understanding this flow helps you spot where leaks actually start.
Water enters the machine through the cold water reservoir at the top. From there, it travels down through a tube to the heating element. This element warms the water to the right temperature. The hot water then rises up through another tube and sprays onto your ground coffee in the brew basket.
The key point: water flows downward and then back up. This means leaks that appear at the bottom often start somewhere higher up in the machine. Gravity pulls water down, so a crack in the reservoir or a loose connection near the top will eventually drip to the floor.
The brew basket sits on top of the drip tray. When water flows through the grounds, it drips down into your cup or carafe. The drip tray catches any overflow. If this tray shifts out of place or cracks, water escapes sideways instead of downward.
Internal tubing connects all these parts. These tubes can become loose, crack, or develop clogs over time. A clog creates pressure buildup inside the machine. This pressure forces water to find another way out, often through weak connection points near the bottom.
Your coffee maker also has a water pump in many models. This pump pushes water through the system. If the pump fails or a valve sticks, water may leak instead of flowing properly through the tubes.
The drip stop valve prevents water from dripping into your cup when the carafe is removed. A faulty drip stop lets water run continuously, which can overflow the tray and create puddles below.
Knowing these parts helps you understand that most bottom leaks come from problems higher in the machine, not actual damage at the base.
Common Causes of Bottom Leaks
Water leaks from the bottom of your coffee maker happen for specific reasons. Understanding these causes helps you fix the problem quickly.
Clogs in internal tubing rank as the most common culprit. Over time, mineral deposits and coffee residue build up inside the machine’s tubes. This blockage creates pressure. Water then forces its way out through the weakest points, which often appear to be the bottom.
Loose hose connections let water escape during the brewing cycle. The tubes that carry water inside your machine can shift or loosen from vibration and repeated use. A connection that seems tight may actually have a tiny gap. Water seeps through this gap and drips downward.
Misaligned brew baskets cause water to overflow instead of flowing properly into your cup. If the basket sits crooked, water spills around the edges. This water then travels down and pools beneath the machine.
Cracked or misaligned water reservoirs are another major cause. A small crack in the reservoir lets water leak slowly. Even a reservoir that doesn’t sit flush in its slot can allow water to escape. The same applies to damaged or misaligned drip trays.
Overfilled water reservoirs create overflow that mimics a bottom leak. When you add too much water, it has nowhere to go. The excess spills out and appears to come from the bottom.
Faulty water pumps in some models fail to move water correctly. A weak pump can’t push water through the system properly. Pressure builds up and water leaks from connection points.
The key point: most leaks actually start higher in the machine. Water flows downward by gravity. What looks like a bottom leak often originates from the reservoir, brew basket area, or internal connections above. This is good news because it means you can usually identify and fix the real problem without replacing your entire machine.
Step-by-Step Troubleshooting Guide
Start by unplugging your coffee maker from the wall outlet. This keeps you safe while you work and prevents electrical damage.
Next, place your machine on a dry towel or paper towels. This helps you see exactly where water drips and catch any spills.
Check the water reservoir first. Remove it from the machine and look for visible cracks or damage. Hold it up to the light. Even small cracks leak water during brewing.
Now inspect the drip tray underneath the brew basket. Look for cracks or gaps. A misaligned tray lets water escape onto your counter instead of collecting it. Try removing and reinserting the tray to ensure it sits flush against the machine.
Examine the brew basket next. Lift it out and check that it aligns properly with the machine. A basket that sits crooked or loose causes water to overflow instead of dripping into your cup. Reinstall it firmly until you hear or feel it click into place.
Look at all visible hose connections inside your machine. Gently tug on hoses to see if they’re loose. A connection that pulls free easily needs reattachment. Most hoses simply push onto fittings, so reseat them firmly.
Fill your reservoir to the correct line. Overfilling causes water to back up and leak out. Never exceed the maximum fill mark indicated on your machine.
Run a descaling cycle using equal parts white vinegar and water. This clears internal clogs that force water out through weak points. Many leaks stop after descaling because clogs created the pressure buildup.
After completing these steps, plug in your machine and run a test cycle over a sink. Watch for leaks during brewing. If water still drips from the bottom, the issue likely involves internal components like a faulty water pump that may require professional repair or machine replacement.
Checking the Water Reservoir and Drip Tray
Your water reservoir and drip tray are the first places to check when your coffee maker leaks from the bottom. These two components catch and hold water, so problems here often cause visible puddles underneath your machine.
Start by removing your water reservoir completely. Hold it up to a light source and look for cracks, splits, or cloudy areas that suggest damage. Even small cracks let water escape during the brewing cycle. Check the seal where the reservoir connects to the machine. A loose or cracked seal allows water to drip out before it even reaches the heating chamber.
Next, examine how the reservoir sits in your machine. Misalignment happens when the reservoir doesn’t click into place properly. Push it down firmly until you hear a click or feel it lock. If it won’t lock, the connection point may be damaged or dirty.
Now inspect your drip tray underneath the brew basket. Remove it and look for cracks or damage along the bottom and sides. Check if water drains properly from the tray. A clogged drain hole in the drip tray causes water to back up and overflow.
Pay attention to how full your reservoir is. Overfilling is a common mistake that causes overflow. Fill your reservoir only to the marked line inside the machine. Water above this line has nowhere to go except back out through the bottom.
Look at the connection points where hoses attach to your reservoir. These connections can loosen over time. Gently push each connection to ensure it’s tight.
If you spot cracks or damage, the reservoir or drip tray likely needs replacement. If everything looks intact, move on to checking internal components like the brew basket alignment and tubing connections. Most bottom leaks start with these visible parts, so this inspection saves you time troubleshooting other areas.
Clearing Clogs With a Descaling Cycle
A descaling cycle uses a vinegar and water solution to flush out mineral buildup and clogs inside your coffee maker. This process is one of the most effective ways to stop leaks caused by blockages in internal tubing.
Start by unplugging your machine and letting it cool completely. This keeps you safe and prevents damage to internal components during the cleaning process.
Fill your water reservoir with equal parts white vinegar and water. Use a standard ratio like one cup of vinegar mixed with one cup of water. This solution breaks down mineral deposits that accumulate over time.
Place an empty mug or container under the brew basket to catch the liquid. You do not want this solution dripping onto your countertop during the cycle.
Turn on your machine and run it like you are making a normal pot of coffee. Let the entire vinegar solution flow through the system. This allows the acidic liquid to reach all the internal passages where clogs form.
Once the cycle finishes, empty the container and refill your reservoir with fresh water only. Run another complete cycle using just plain water. Do this at least twice to rinse out all vinegar residue and mineral particles.
The descaling cycle works by loosening debris stuck in narrow tubes and passages. Water pressure from the pump helps push these particles out. Many leaks stop completely after one or two descaling cycles.
Run this process monthly if you have hard water. Hard water contains more minerals that build up faster inside your machine. Regular descaling prevents clogs from forming in the first place.
If your leak continues after descaling, the problem likely comes from a different source. Check your hose connections, brew basket alignment, or water reservoir for cracks. A persistent leak after descaling usually points to a mechanical issue rather than a clog.
Mistakes That Make Leaks Worse
Many people make simple mistakes that actually make their coffee maker leak worse. Understanding these errors helps you avoid turning a small problem into a major one.
Overfilling your water reservoir is the biggest culprit. You push water above the fill line thinking more water means more coffee. Instead, excess water backs up during the brewing cycle and overflows from the top or sides of your machine. This creates leaks that appear to come from the bottom, even though the real problem is at the top. Always fill your reservoir to the marked line only.
Using the wrong size coffee filters causes another common mistake. Filters that are too large or too small allow coffee grounds to escape into the water pathways. These grounds mix with water and create clogs in your internal tubes. Clogs force water to find alternate routes, which often means leaking from unexpected places like the bottom.
Ignoring early warning signs makes leaks spread faster. Small drips are your machine’s way of telling you something is wrong. Many people ignore these early leaks and keep using their coffee maker. The problem gets worse each day. What starts as a tiny drip becomes a steady stream within a week or two.
Forcing the brew basket into place without checking alignment damages internal seals. You might hear a click and assume it is seated correctly, but misalignment creates gaps where water escapes. Always verify the basket sits flat and level before brewing.
Running your machine without descaling allows mineral buildup to accumulate. This blockage increases pressure inside your tubes, forcing water to leak from weak connection points at the bottom. Regular descaling prevents this pressure buildup from ever happening.
These mistakes are easy to fix once you recognize them. Stop making them today, and your leaking problem becomes much easier to solve.
When to Consider Professional Repair or Replacement
A leaking coffee maker doesn’t always need replacement. Many leaks stop after you try basic fixes like descaling, checking alignment, and filling your reservoir correctly. However, some situations mean professional repair or replacement makes more sense.
Consider professional repair if your machine is relatively new and expensive. A technician can diagnose internal problems like a faulty water pump or damaged internal tubing. Repair costs are worthwhile for machines you’ve owned less than a year or that originally cost significant money.
Replacement becomes the better choice when your machine is older. Most coffee makers last between five and ten years. If yours has leaked multiple times despite your fixes, the internal components are likely wearing out. Repeated repairs often cost as much as a new machine anyway.
Pay attention to where the leak originates. If water comes from the bottom but the source is actually your water reservoir or overflow area higher up, fixing that specific part might solve everything. However, if water leaks from the actual bottom housing or internal pump area, internal damage is likely present.
Test one more time before deciding. Unplug your machine and let it sit for several hours. Then plug it back in and run a fresh descaling cycle. Sometimes mineral deposits block water pathways completely, and a thorough cleaning stops leaks entirely.
If leaking continues after descaling, check that your brew basket sits properly aligned and your water reservoir connects tightly. Loose connections cause persistent leaks that descaling won’t fix.
When your machine leaks constantly despite these efforts, water damage inside becomes inevitable. Internal corrosion and mold growth make the machine unsafe to use. At that point, replacement protects your health and saves frustration.
Trust your instincts about whether repair or replacement makes sense for your situation and budget.
Final Thoughts
A leaking coffee maker feels frustrating. But now you know it rarely means your machine is broken beyond repair.
Most leaks come from simple, fixable problems. Loose connections, clogged tubes, and misaligned parts cause most water leaks.
Remember this key fact: leaks often start higher up in your machine, not at the bottom itself. Your reservoir, drip tray, or brew basket usually causes the actual problem.
Start with the easy checks first. Look at your water reservoir for cracks. Check if your drip tray sits correctly. Make sure you have not overfilled the water tank.
A simple descaling cycle solves many leak problems. Vinegar and water clear out mineral buildup and clogs inside your machine. This process takes just minutes and costs almost nothing.
Avoid the common mistakes that make leaks worse. Do not overfill your reservoir. Use the correct filter size for your machine. Never ignore small drips, since they turn into bigger problems.
Pay attention to your machine’s age and behavior. A newer machine with a sudden leak likely needs simple repair. An older machine that leaks constantly might need replacement.
Test your fixes before giving up. Unplug your machine and let it rest. Then run a plain water cycle to check if leaking stops.
Trust your observations about where water appears. This detail helps you pinpoint the real cause faster.
Most coffee makers respond well to basic troubleshooting. You do not need special tools or expert skills for common leaks.
Take these steps one at a time. Check connections, clean your machine, and watch for patterns. Your coffee maker will likely work fine again soon.
Small maintenance habits prevent future leaks too. Regular cleaning and careful filling keep your machine running smoothly for years ahead.
Frequently Asked Questions
Is the leak coming from the bottom or somewhere higher up?
Water that pools under your machine often doesn’t come from the bottom itself. Check your water reservoir first. Look for cracks or loose connections at the top. Water frequently drips down from the reservoir or overflow areas and collects beneath the machine.
Inspect your drip tray too. A misaligned or cracked tray catches water poorly. Tip your machine slightly to see where water actually originates. Most “bottom leaks” start much higher up.
What should I check before calling for repairs?
Start by unplugging your machine. Wait several hours and inspect the water reservoir for cracks. Make sure it sits properly in place and connects securely.
Next, check your brew basket alignment. Remove it and look inside. The basket should fit snugly without forcing. A misaligned basket allows water to escape sideways.
Run a descaling cycle using vinegar and water. This clears internal clogs that cause overflow. Let the cycle complete fully. Test your machine afterward to see if leaking stops.
Can overfilling the water reservoir cause leaks?
Yes, absolutely. Filling above the maximum line forces water out during brewing. The machine has limited space for water expansion and steam. Excess water has nowhere to go except out of seams and openings.
Always fill to the marked line only. This simple step prevents many leak problems. Check your reservoir markings clearly before adding water.
Why does my machine leak even after descaling?
Mineral buildup isn’t always the only cause. After descaling, verify your brew basket sits correctly. A loose basket lets water bypass the filter and escape.
Inspect hose connections inside your machine. Some connections loosen over time. If you feel comfortable, gently push connections back into place. Otherwise, professional service can handle this safely.

Hi, I’m Luna! I’m the voice behind CoffeePickster.com. I’m a coffee obsessive who’s spent way too many hours (and dollars) testing coffee makers so you don’t have to. I created this blog to help fellow coffee lovers find the right gear without the guesswork. Let’s brew something great together!