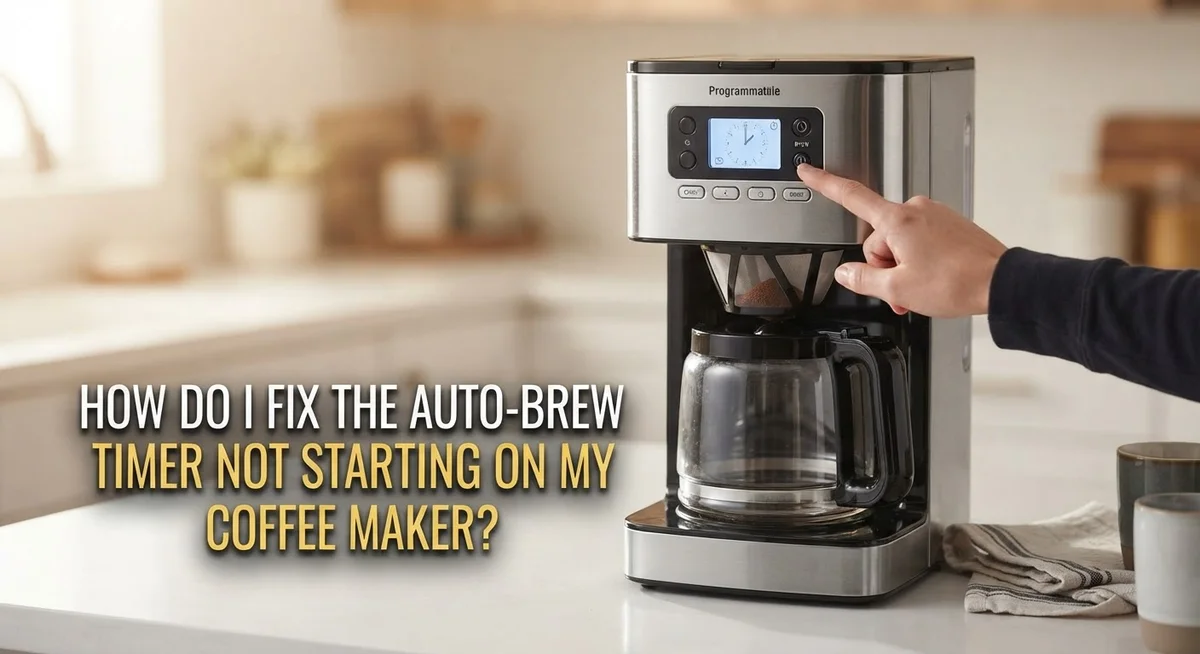
How Do I Fix The Auto-Brew Timer Not Starting On My Coffee Maker?
Waking up to fresh coffee sounds perfect. But what happens when your auto-brew timer just refuses to start?
You set the time. You pressed the buttons. Yet your coffee maker stays silent and cold.
This is one of the most common coffee maker problems out there. The good news? It’s usually a simple fix.
Most auto-brew failures happen because of small setup mistakes. Maybe the clock time is wrong. Maybe you forgot to activate the “AUTO” indicator. Or maybe you didn’t hold a button long enough.
In this guide, we will walk you through exactly why your timer isn’t working. We will show you how to check your current time settings first.
In a Nutshell
- Set the current time first. Your coffee maker needs the correct clock time before it can calculate the brew start time. Skip this step and the timer will not work.
- Activate the AUTO button. Setting a brew time is not enough. You must press AUTO to turn the feature on.
- Check the auto indicator light. After setup, this light should stay on. If it turns off, the timer will not start brewing.
- Hold buttons long enough. Braun models often need you to press AUTO ON for at least 3 seconds until the hours flash.
- Rebuild settings if stuck. Clear the clock and auto-brew settings completely. Then start fresh from step one.
- Double check your AM and PM settings. A wrong time period is a sneaky reason your coffee never brews on schedule.
How the Auto-Brew Timer Is Supposed to Work
Your coffee maker’s auto-brew timer works in a simple sequence. First, the machine stores the current time in its internal clock. Next, you tell it when you want the coffee to brew.
The timer then waits until that exact moment arrives. When the scheduled time matches the clock, the heating element turns on automatically. Water flows through the grounds, and your coffee brews without any button pressing from you.
Here’s what happens behind the scenes. Your coffee maker compares two pieces of information constantly. It checks the current time against your desired brew start time. The moment they match, the brewing cycle begins.
Most auto-brew timers use a 12-hour or 24-hour clock format. This matters because setting 7:00 AM is different from 7:00 PM. The machine needs both the hour and minute values to work correctly.
The auto indicator light is your confirmation tool. After you program everything, this light should stay visible on the display. If it disappears, the auto-brew feature is not actually active. Your coffee maker won’t brew automatically even though you set the time.
The feature requires power to stay active. If your coffee maker loses electricity, the timer resets. You’ll need to reprogram everything from scratch.
Button holding time matters more than you think. Some models require you to hold buttons for several seconds. Pressing quickly and releasing won’t activate the feature. The machine needs sustained pressure to register your command.
Your coffee maker also needs water in the reservoir and ground coffee in the filter. The auto-brew timer only controls when brewing starts. It doesn’t fill the water or add the grounds for you.
Understanding this process helps you troubleshoot problems faster. When something goes wrong, you know exactly which step failed. This knowledge makes fixing the timer much easier.
Step-by-Step: Setting the Current Time Correctly
Your coffee maker needs to know what time it is right now before it can schedule a future brew. This is the critical first step that many people skip or rush through.
Start by locating the CLOCK button on your machine. Press it to enter clock setting mode. Your display should show the current hour and minute. Use the HOUR and MIN buttons to adjust these numbers to match the actual time.
Pay close attention to AM and PM settings. A wrong time period means your coffee maker will brew at the wrong part of the day. If you set 7:00 but forget to switch from PM to AM, your machine will wait until evening instead of morning.
Some coffee makers require you to hold the CLOCK button for a few seconds before the display starts flashing. Check your user manual to see if your model needs an extended press. This button holding time is easy to overlook, but it makes a real difference.
After you set the current time, verify it displays correctly on the screen. Leave it for a few seconds to confirm the display stays stable. If the time keeps resetting or disappearing, your machine may have a power issue or a faulty clock circuit.
Once the current time is locked in and showing accurately, your coffee maker now has the reference point it needs. Without this foundation, the auto brew timer cannot calculate when to start brewing.
Double check the time one more time before moving forward to set your desired brew start time. Getting this step right prevents confusion later. Your future brew time depends on this current time being absolutely correct. Take the extra 30 seconds to verify everything matches your actual clock before proceeding to the next steps.
Step-by-Step: Programming Your Desired Brew Start Time
Now that your coffee maker knows the correct current time, you can program when you want it to brew. This step is straightforward once you understand the sequence.
Start by pressing the “HOUR” button. This button controls the hour value for your desired brew start time. Each press moves the hour forward by one. Keep pressing until you reach the hour you want brewing to begin. If you overshoot, many coffee makers let you cycle through again by continuing to press.
Next, press the “MIN” button to set the minutes. Similar to the hour setting, each press advances the minutes. Most machines jump by five or ten minute intervals. Stop when you reach your target minute. For example, if you want coffee at 7:30 AM, set the hour to 7 and minutes to 30.
After entering both the hour and minutes, verify the time displays correctly on your screen. Take a moment to double check that what you see matches what you intended. This prevents brewing at the wrong time.
Now comes the critical step: press the AUTO button to activate the feature. This button turns on the auto-brew function. Without pressing it, your coffee maker will not start brewing automatically at the scheduled time. You might see an “AUTO” indicator light appear on the display after you press this button.
Some machines require you to hold the AUTO button for several seconds. Watch your display closely. The light should stay on after you release the button. If it disappears, repeat the process and hold longer.
Once the auto indicator remains visible, your brew time is programmed and active. Your coffee maker will now wait for that exact moment to arrive before starting the brewing cycle. The machine is ready to deliver fresh coffee at your scheduled time.
Activating and Confirming the Auto Indicator
After you program your brew time, the auto indicator is your confirmation that everything works correctly. This small light or symbol tells you the auto feature is actually active and ready to brew.
Check your display right after pressing the AUTO button. You should see a light, icon, or text appear on your screen. This indicator stays visible as long as the auto feature remains on. If it disappears, the feature did not activate properly.
Some coffee makers display the auto indicator as a small LED light near the timer buttons. Others show it as a symbol on the digital screen itself. Look at your machine’s control panel carefully. The indicator might say “AUTO,” show a clock icon, or display a specific symbol unique to your model.
Hold the AUTO button long enough for the indicator to appear. Many machines require you to press and hold for at least three seconds. Quick button taps often fail to activate the feature. Count slowly to three while holding the button down. Wait until you see the indicator light up before releasing.
After the indicator appears, leave your coffee maker plugged in. The auto feature needs constant power to work. If you unplug the machine or lose power, the timer resets and the indicator disappears.
Verify the indicator stays on for several minutes after setup. If it turns off immediately, something went wrong. The feature should remain active until the scheduled brew time arrives or you manually turn it off.
If the indicator never appears, try rebuilding your settings from scratch. Set the current time again, then reprogram your desired brew start time. Press and hold the AUTO button longer this time. Sometimes starting fresh fixes activation problems that confuse the system.
Brand-Specific Instructions: Braun and Other Common Models
Braun coffee makers have a specific process for activating the auto brew timer. The key difference with Braun models is the button hold duration. You must press and hold the AUTO ON button for at least 3 seconds until you see the hours flash on the LED display.
Start by confirming your current time is correct. This is the foundation your machine needs to schedule future brews. Without accurate current time, the auto brew feature cannot calculate when to start brewing.
Next, use the HOUR and MIN buttons to set your desired brew start time. Press HOUR first to set the hours. Then press MIN to adjust the minutes to your preferred start time. Watch the display as you input each value.
The critical step comes after setting your brew time. Press and hold the AUTO ON button. Count to at least 3 seconds while holding it down. You will see the hours begin to flash on your Braun’s LED screen. This flashing indicates the auto feature is activating properly.
Other common coffee maker models follow a similar pattern but may use different button names. Look for buttons labeled AUTO, BREW START, or TIMER DELAY on your specific machine. The principle remains the same across brands: set current time, program desired start time, then activate the auto feature.
If your auto brew timer still won’t start, rebuild your settings from scratch. Unplug the machine for 30 seconds to reset the clock completely. Then repeat the entire process carefully, paying special attention to button hold times.
Verify the auto indicator stays visible on your display after setup. This light or icon confirms your settings are active and saved. If the indicator disappears immediately, your activation didn’t register properly. Try the process again, holding buttons longer this time.
Common Mistakes That Prevent the Timer From Starting
Many people struggle with their auto brew timer because they skip or misunderstand key setup steps. Understanding these common mistakes helps you fix the problem quickly.
The biggest mistake is forgetting to activate the auto feature after setting your desired brew time. You can program the exact hour and minutes perfectly, but if you don’t press the AUTO button, nothing happens. Your coffee maker simply ignores your settings. The timer needs that final activation step to actually work.
Another frequent error involves not holding buttons long enough. Some coffee makers, especially certain brands, require you to press and hold the AUTO button for a minimum of three seconds. If you just tap it quickly, the system won’t register your command. The auto indicator won’t appear on your display, which means the feature never truly activates.
Many people also fail to set the current time correctly before programming their brew start time. Your coffee maker needs to know what time it is right now. Without accurate current time information, it cannot calculate when to start brewing. If your clock shows the wrong time, your brew will start at the wrong time too.
Some users set everything up but don’t verify that the auto indicator stays active after setup. You should see a light, icon, or text confirmation on your display. If this indicator disappears immediately after you finish programming, your settings didn’t stick properly.
The solution is simple: rebuild your settings from scratch. Start over with setting the current time. Then program your desired brew start time. Finally, press and hold the AUTO button until you see the auto indicator appear and stay visible on your screen.
These mistakes are easy to fix once you know what to watch for. Double checking each step prevents frustration and gets your timer working correctly.
Troubleshooting: Rebuilding Your Settings From Scratch
When your auto brew timer stops working, the best solution is to clear everything and start fresh. This approach removes any corrupted settings that might be blocking your timer from starting.
Begin by unplugging your coffee maker for 30 seconds. This simple step resets the internal memory and clears any stuck commands. Plug it back in and wait for the display to stabilize.
Next, set your current time. Press the HOUR and MIN buttons to input today’s exact time. This step is essential because your coffee maker cannot schedule a future brew time without knowing the current time first. Take your time here and double check the numbers on your display.
Now set your desired brew start time. Use the same HOUR and MIN buttons to enter when you want coffee ready. For example, if you want coffee at 7 AM tomorrow, enter 7 in the hour field and 0 in the minutes field.
The critical next step is activating the auto feature. Press and hold the AUTO button. For most models, you need to hold it for at least 3 seconds until you see the auto indicator appear on your display. Some coffee makers show a light, an icon, or the word “AUTO” on the screen. This indicator confirms the feature is truly active.
Leave your coffee maker plugged in and verify the auto indicator stays visible. If it disappears within a few minutes, your settings did not save properly. Repeat the process again, holding buttons longer this time.
After completing these steps, your auto brew timer should function correctly. The timer will activate at your scheduled time and begin brewing. If problems persist after rebuilding from scratch, your coffee maker may have a deeper hardware issue requiring professional service.
Final Thoughts
Fixing your auto brew timer is easier than it looks. Most problems come from small setup mistakes. A quick reset often solves the issue completely.
Start with the basics every time. Check your current time first. Then set your brew start time. Finally, activate the auto feature.
This simple sequence fixes most timer problems. Skipping any step causes the timer to fail. Your coffee maker needs all three steps completed in order.
For Braun models, remember the three second rule. Hold the AUTO ON button for at least three seconds. The hours must flash on the LED screen. This confirms the setting worked correctly.
If your timer still won’t start, don’t panic. Unplug your machine and wait thirty seconds. This clears any glitches in the system.
Then rebuild your settings from the beginning. Set the current time again. Program your desired brew time next.
Activate the auto feature last. Watch for the auto indicator to appear. It should stay visible on your display.
Testing your setup matters too. Wait a few minutes after finishing setup. Check if the indicator remains active.
If it turns off right away, something went wrong. Simply repeat the entire process again. Most people fix their timer on the second try.
Coffee makers are simple machines at their core. They just need correct information in the right order. Your current time, brew time, and activation all work together.
Take your time during setup. Rushing causes most of these problems. A few extra seconds now saves frustration later.
Once everything works, your coffee maker remembers these settings. You won’t need to repeat this process daily. Enjoy your fresh coffee brewing automatically each morning.
Patience and careful steps solve this problem every time. Your auto brew feature will work reliably once set up correctly.
Frequently Asked Questions
Why isn’t my auto brew timer starting even after I set the time?
The auto indicator probably isn’t active. You must press the AUTO button after setting your desired brew start time. Many people forget this final step. Check that the auto indicator light appears on your display. If it doesn’t show, your timer won’t activate.
How long do I need to hold the button for the timer to work?
This depends on your model. For Braun coffee makers, hold the AUTO ON button for at least 3 seconds. You’ll see the hours flash on the LED display when you’re holding it correctly. Shorter presses won’t activate the feature. Count slowly to make sure you reach the full 3 seconds.
Should I set the current time before programming my brew start time?
Yes, absolutely. Set your current time first. Your coffee maker needs to know what time it is right now. Then program your desired brew start time. Skipping the current time step causes scheduling problems.
What should I do if my timer still won’t work after setup?
Rebuild your settings from scratch. Unplug your coffee maker for 30 seconds. Plug it back in and set the current time again. Then set your desired brew start time. Press the AUTO button last to activate the feature. Verify the auto indicator stays visible. This simple reset fixes most timer problems.
Why does my auto indicator disappear after I finish setting everything up?
Your settings may not have saved properly. Rebuild them again, but this time take your time with each step. Don’t rush through the process. After you activate the auto feature, wait a few minutes and watch the display. The auto indicator should remain visible throughout.

Hi, I’m Luna! I’m the voice behind CoffeePickster.com. I’m a coffee obsessive who’s spent way too many hours (and dollars) testing coffee makers so you don’t have to. I created this blog to help fellow coffee lovers find the right gear without the guesswork. Let’s brew something great together!