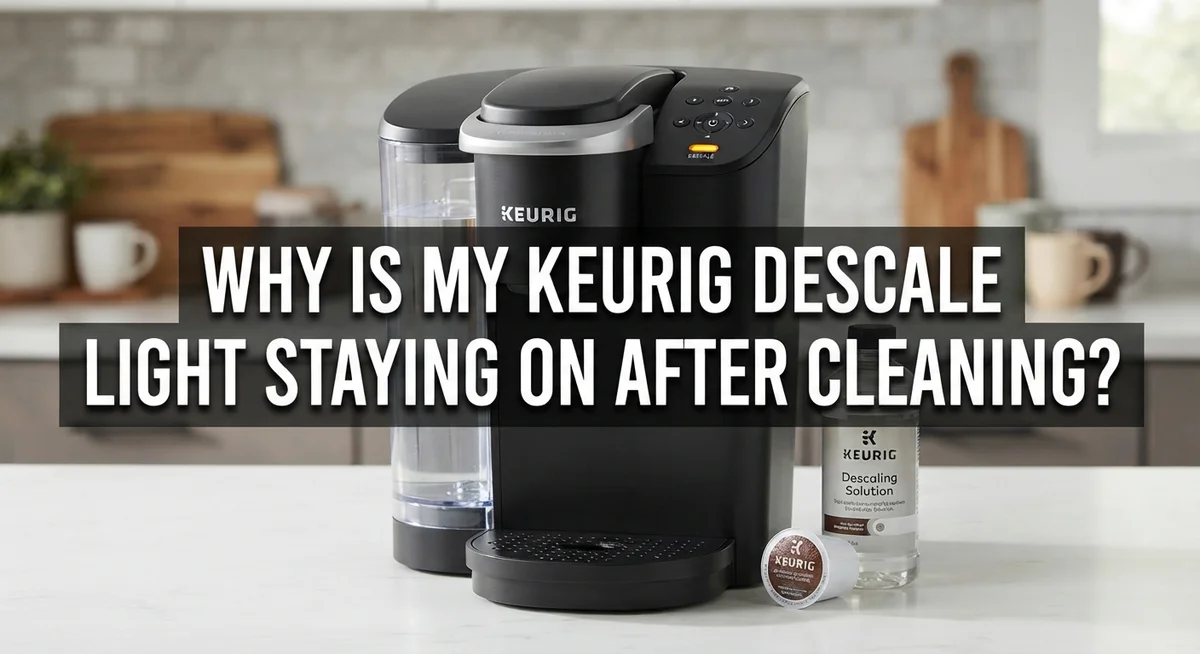
Why Is My Keurig Descale Light Staying On After Cleaning?
You clean your Keurig. You run the descaling cycle. But that little descale light just won’t turn off.
Sound familiar? You’re not alone.
This annoying issue trips up many Keurig owners. You follow the steps. You wait. Yet the light stays on like it’s mocking you.
Here’s the truth. A stubborn descale light usually means something got missed. Maybe the solution didn’t fully circulate. Maybe your machine needs more than one cleaning cycle.
Sometimes the fix is simple. Other times, mineral buildup runs deeper than expected.
In this guide, we’ll walk through why this happens. You’ll learn the real reasons behind a persistent descale light.
We’ll also cover how to reset it properly. Many people try unplugging their machine first. That step alone won’t solve the problem.
You need the correct button sequence to clear the alert.
By the end, you’ll know exactly what to check. You’ll understand how to run a proper descaling cycle. And you’ll finally get that light to turn off for good.
Let’s fix this together, step by step.
In a Nutshell
Here’s the quick rundown before you dive into details.
-
The descale light stays on when solution doesn’t fully circulate through your machine’s internal lines. Clogged parts also cause this issue.
-
One cycle often isn’t enough. Heavily contaminated machines usually need at least two full descaling cycles to clear buildup completely.
-
Unplugging your Keurig won’t reset the light. You must use a specific button sequence to clear the alert properly.
-
To reset it, hold the brew button for five seconds. You can also hold the 8oz and 10oz buttons together for three seconds.
-
No commercial descaler on hand? A mix of half vinegar and half water works as a simple substitute solution.
-
Always check that solution flows through every water line. Skipping this step often causes the light to reappear quickly.
This summary gives you the basics. The sections below explain each step in detail, so you can fix this issue for good and get back to brewing your coffee.
What the Descale Light Actually Means
Your Keurig’s descale light serves one main purpose. It tells you that mineral buildup exists inside your machine’s water lines.
When you see this light, your machine detected that calcium and other minerals have accumulated in the internal plumbing. These deposits block water flow and affect brewing quality. The light acts as your machine’s way of saying “clean me now.”
The descale light specifically monitors whether cleaning solution has circulated completely through all water pathways. Your Keurig has internal lines that carry water from the reservoir to the heating chamber and out through the brew head. Minerals clog these pathways over time.
Here’s what happens during descaling. You run a cleaning solution through the machine. This solution breaks down mineral deposits and flushes them out. But here’s the catch: one cycle usually doesn’t complete the job fully.
The light stays on because the solution hasn’t reached every corner of your machine’s internal system. Heavy contamination requires multiple passes. Think of it like washing a very dirty dish. One rinse doesn’t always get everything clean.
Your machine won’t reset this alert until it senses that descaling is actually complete. This is different from other warning lights. The descale indicator specifically checks that the cleaning process worked.
This means unplugging your Keurig won’t help. The light isn’t a simple on/off switch. It’s a sensor reading your machine’s internal condition.
Understanding this helps you fix the problem correctly. You’re not dealing with a broken light. You’re dealing with a machine that genuinely needs more thorough cleaning. The light persists because your machine detected incomplete circulation of cleaning solution through its water system.
How to Properly Activate Descale Mode
To enter Descale Mode on your Keurig, you need to use the correct button combination. Make sure your machine is plugged in first. Unplugging it won’t help you access this mode.
Hold down the 8oz and 12oz buttons at the same time. Keep them pressed for exactly 3 seconds. You should see the descale light begin to blink or change appearance. This signals that your machine is now ready for cleaning.
Once Descale Mode activates, your Keurig enters a special cycle. The machine will pump descaling solution through all internal water lines. This circulation is what actually clears mineral buildup from your system.
Running one cycle usually isn’t enough. Most Keurig machines need the descaling solution to flow through at least twice. This ensures the solution reaches every corner of the internal plumbing.
After you finish running the descaling solution through, you’ll need to reset the light. Hold the brew button for 5 seconds. Alternatively, you can hold the 8oz and 10oz buttons together for 3 seconds. Either method will clear the alert.
Some machines have different button layouts. Check your specific model’s manual if the button combination doesn’t work. Different Keurig versions sometimes use slightly different sequences.
Here’s a practical tip: don’t rush the process. Let each cycle complete fully before starting another one. Wait a few minutes between cycles so the machine can properly drain.
If you’re using a vinegar and water solution instead of commercial descaler, follow the same steps. The button sequences remain identical regardless of which cleaning liquid you choose.
Your machine will only reset the light once it detects that descaling is truly complete. This means the solution must actually circulate through all water pathways. Patience during this process prevents the light from staying on afterward.
Step-by-Step: Correctly Resetting the Descale Light
Your Keurig needs the correct button sequence to reset the descale light. This isn’t complicated, but precision matters here.
Start with your machine powered on. Hold down the brew button for five full seconds. Release it and wait. Your machine will beep or display a confirmation message. This is the simplest reset method for most Keurig models.
If that doesn’t work, try the alternative button combination. Hold the 8oz and 10oz buttons together for three seconds while the machine is powered on. Keep holding until you see a response. Different Keurig models use different buttons, so one of these methods will work for yours.
Make sure your machine is plugged in during this entire process. Many people unplug their Keurig thinking it will reset the light. It won’t. The descale indicator lives in your machine’s memory and only clears through the proper button sequence.
After you press the reset buttons, run fresh water through your machine. Fill the reservoir with plain water and run a brew cycle without a K-Cup. Let the water flow completely. Do this at least twice to flush out any remaining descaling solution.
The light should turn off after these steps. If it stays on, your machine likely needs another full descaling cycle. This happens when mineral buildup is heavy or the solution didn’t reach all internal areas during your first attempt.
Run your descaling solution through again, then repeat the reset button sequence. Some heavily contaminated machines need two or three complete cleaning cycles before the light finally switches off.
Don’t force anything or press buttons randomly. Follow one method, complete the water flush, then check your results. Patience with this process saves you frustration later.
Common Reasons the Light Won’t Turn Off
Your Keurig’s descale light stays on for specific reasons. Understanding these causes helps you fix the problem quickly.
Incomplete Solution Circulation is the main culprit. The descale light monitors whether cleaning solution has reached every internal water line. If the solution didn’t flow through all pathways, the light remains active. Your machine won’t reset until it confirms the cleaning cycle is truly complete.
Heavy Mineral Buildup causes persistent lights too. When your machine has significant contamination inside, one cleaning pass isn’t enough. The internal sensors detect remaining deposits and keep the light on as a warning.
Running Only One Cycle is a common mistake people make. Most machines need the descaling solution to run through at least twice. The first cycle loosens buildup. The second cycle removes what the first pass dislodged.
Unplugging Doesn’t Help. Many people think powering off will reset the light. This doesn’t work. Your Keurig needs the correct button sequence to acknowledge that descaling finished properly.
Blocked Water Lines inside the machine can trap solution. If passages are severely clogged, the cleaning liquid can’t circulate fully. This triggers the light to stay on even after you’ve run solution through multiple times.
Incorrect Reset Button Sequence leaves the light active. You must hold the right buttons for the full duration. If you release too early or press the wrong combination, the reset won’t register.
The solution involves running your descaling liquid through the machine twice, ensuring water flows from both the top and bottom outlets. Then use the correct reset button combination while your machine is plugged in and powered on. If the light persists after these steps, your machine needs another complete descaling cycle. Heavily contaminated machines sometimes require three or four cycles before the sensors register that cleaning is complete.
Mistakes That Cause Descaling to Fail
The descale light stays on because your machine detects incomplete cleaning. Understanding common mistakes helps you fix this problem.
Using descaling solution only once is the biggest error people make. Your Keurig needs the solution to circulate through all internal water lines twice minimum. One cycle simply doesn’t reach every clogged area inside the machine. Run the solution through completely, then repeat the entire process again before attempting a reset.
Not allowing full circulation causes the light to remain active. You must let the descaling solution flow from the top water reservoir all the way through the dispensing area. Watch to ensure liquid comes out of both the regular brew outlet and the secondary dispenser. If water trickles slowly or stops, internal blockages are preventing proper cleaning.
Pressing the wrong reset buttons won’t turn off the light. Your machine requires a specific button sequence to acknowledge that descaling is complete. If you use the incorrect combination or press buttons too quickly, the light ignores your command. The machine stays in descale mode until it receives the exact signal it expects.
Unplugging your Keurig creates another common mistake. Simply removing power doesn’t reset the descale indicator. The light persists because your machine’s memory system remains active even without electricity. You must use the correct button combination while the machine is plugged in and powered on.
Heavy mineral contamination sometimes requires three or four cleaning cycles instead of two. If your machine sat unused for months or you have extremely hard water, buildup becomes severe. Multiple passes with descaling solution gradually break down thick mineral deposits that block water flow.
These mistakes compound each other. Skip one step, and the light refuses to turn off. Follow each correction carefully, and your descale light will finally reset properly.
Troubleshooting Persistent Descale Alerts
When your Keurig’s descale light stays on after cleaning, the machine is telling you something important. The light won’t turn off until your machine confirms that descaling is truly complete. This happens because your Keurig detects incomplete circulation of cleaning solution through its internal water lines.
The most common reason for a persistent descale light is that the cleaning solution hasn’t reached all the places it needs to go. Your machine has tiny water pathways inside that can trap mineral buildup. If the solution doesn’t flow through every single one of these pathways, the sensor stays active and keeps the light on.
Heavy mineral contamination requires extra attention. If your machine hasn’t been cleaned in a long time, one or two descaling cycles may not be enough. Some machines need three or four complete cycles to remove all the buildup. Each cycle should run the full descaling solution through the machine, not just a quick rinse.
Make sure you’re using the correct reset sequence after descaling. Hold the brew button for five full seconds while your machine is powered on and plugged in. If that doesn’t work, try holding the 8oz and 10oz buttons together for three seconds. These button combinations tell your machine to check if descaling is complete.
Running fresh water through your machine after descaling is also essential. This final rinse helps flush out any remaining solution and confirms to your Keurig that the cleaning cycle finished properly.
If the light still won’t turn off after trying these steps, your machine likely needs another full descaling cycle. This isn’t unusual for machines with heavy mineral deposits. Repeat the entire process: run descaling solution through, do a water rinse, then use the reset button sequence again. Your Keurig will turn off the light once it’s satisfied that the cleaning is truly done.
When to Run Multiple Descaling Cycles
Your Keurig machine needs multiple descaling cycles when mineral buildup is heavy. One pass through isn’t always enough to clean everything inside.
Here’s why multiple cycles matter. The descaling solution must reach every corner of your machine’s internal water lines. If you run it just once, some areas stay clogged with mineral deposits. Your machine detects this incomplete cleaning and keeps the descale light on.
Start by running your first descaling cycle completely. Let the solution flow through the entire machine into your cup or sink. Once finished, empty the water reservoir and refill it with fresh water. Run clean water through the machine several times to rinse away leftover solution.
Now comes the important part. Run your descaling solution through the machine a second time. This second cycle targets deposits the first cycle missed. Pay attention to water flow from both the top and bottom of the machine. Strong, consistent flow means the solution is reaching all areas.
After your second descaling cycle, empty everything again. Refill with fresh water and run multiple rinse cycles until you smell no descaling solution. This removes any remaining chemical residue.
Reset your machine using the correct button sequence. Hold your brew button for five full seconds while the machine is powered on and plugged in. Some models require holding the 8oz and 10oz buttons together for three seconds instead.
If the descale light still stays on, your machine needs a third cycle. Heavy contamination sometimes requires three or even four cleaning passes. Don’t skip this step. Repeat the entire process until the light finally turns off.
This approach works because it ensures complete circulation throughout your machine’s internal system. Patience with multiple cycles prevents future clogs and keeps your Keurig working properly.
Final Thoughts
A persistent descale light feels frustrating, but it’s rarely a sign of a broken machine. Most cases simply mean your Keurig needs one more cleaning round to clear out stubborn mineral deposits.
Think of the light as a helpful signal, not a warning of failure. Your machine is simply asking for a bit more care before it’s ready to brew again.
Patience makes a real difference here. Rushing through the reset sequence or skipping a cycle often leads to the same problem repeating itself.
Take time to follow each step in order. Power off the machine, activate descale mode correctly, and let the solution work through every part of the system.
Remember that older machines or ones used daily may need extra cycles. This is normal and doesn’t mean something is wrong with your Keurig.
A little consistency goes a long way. Regular cleaning every few months prevents heavy buildup from happening in the first place.
If you’ve tried several cycles and the light still won’t budge, check your button sequence again. A small mistake in timing or button choice can undo your progress.
Once the light finally turns off, run a few cycles of plain water. This step confirms your machine is clean and ready for your next cup.
Keeping a simple routine helps you avoid this problem again. Descale on schedule, reset properly, and your Keurig will reward you with smooth, reliable brewing.
In the end, a stuck descale light is just a small hurdle. With the right steps and a little patience, your machine will be back to normal in no time.
Trust the process, follow the sequence, and give your Keurig the attention it needs. Clean water and proper care keep every cup tasting its best.
Frequently Asked Questions
Why does unplugging my machine not turn off the descale light?
Unplugging your Keurig won’t reset the descale indicator. The machine has an internal memory that stores the descale alert. Simply removing power doesn’t clear this setting. You need to use the proper button sequence to reset it. Hold the brew button for five seconds while the machine is powered on and plugged in. This action tells your machine that descaling is complete.
Can I use vinegar instead of commercial descaling solution?
Yes, you can make a cleaning solution at home. Mix equal parts white vinegar and water. This combination works well for breaking down mineral deposits inside your machine. Run the vinegar solution through a full descaling cycle just like you would with commercial descaler. Follow up with fresh water cycles to rinse away any vinegar smell or taste.
How many times should I run the descaling cycle?
Most machines need at least two complete cycles minimum. If your descale light stays on after two cycles, run a third one. Heavily contaminated machines may need even more passes. Each cycle allows the cleaning solution to circulate through different internal water lines. Think of it as layers of cleaning that build on each other.
What does it mean if the light stays on after multiple attempts?
A persistent descale light signals incomplete solution circulation. Your machine still has mineral buildup in its internal passages. Run another full descaling cycle and ensure the solution flows completely through the tank and brewing mechanism. Make sure you’re using enough descaling solution and letting it sit briefly between cycles. If it continues, your machine may have stubborn contamination requiring patience and repetition.

Hi, I’m Luna! I’m the voice behind CoffeePickster.com. I’m a coffee obsessive who’s spent way too many hours (and dollars) testing coffee makers so you don’t have to. I created this blog to help fellow coffee lovers find the right gear without the guesswork. Let’s brew something great together!