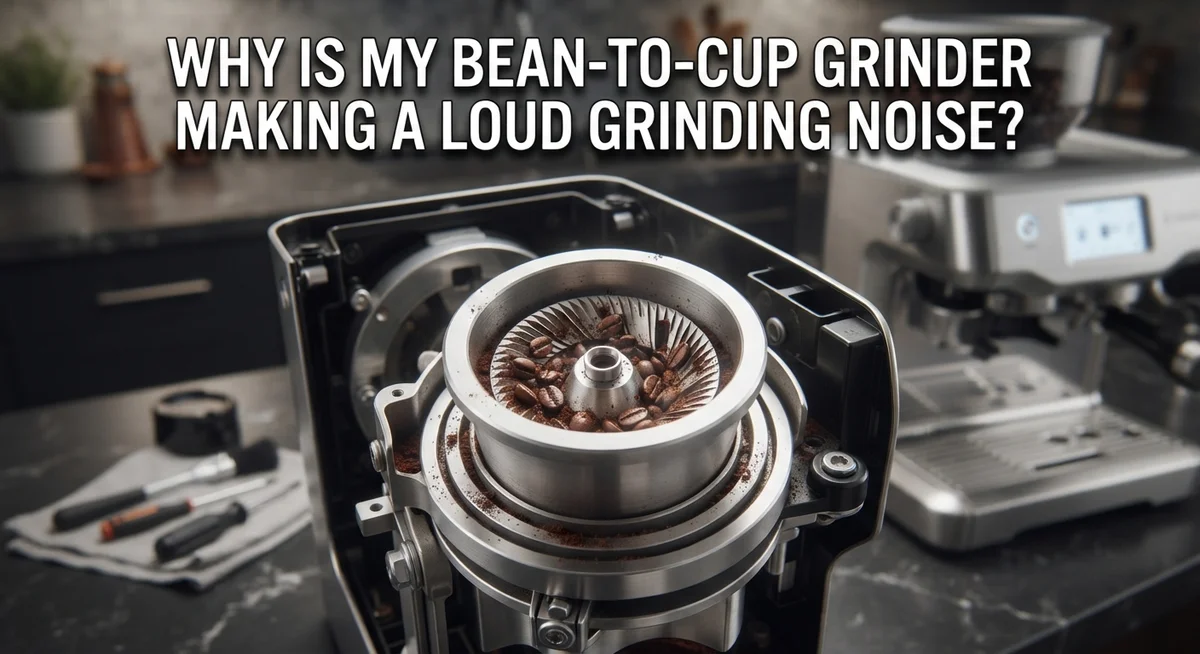
Why Is My Bean-To-Cup Grinder Making A Loud Grinding Noise?
You wake up, walk to your kitchen, and press the button on your bean-to-cup grinder. Instead of a smooth whir, you hear a loud grinding noise. It sounds harsh. It sounds wrong.
This noise can catch anyone off guard. Your machine usually hums quietly through its cycle. So when it suddenly screeches or rattles, you start to worry.
The good news? This problem is common and often easy to fix. Most loud noises come from simple issues like worn burrs, oily beans, or foreign objects stuck in the hopper.
In this guide, we will walk through the most common causes behind that noise. We will also share simple troubleshooting steps you can try at home.
In a Nutshell
- Worn or chipped burrs are the most common culprit. Check them for damage and replace if needed.
- Foreign objects like small stones or plastic bits can get stuck in the hopper. Always vacuum it out and inspect your beans before grinding.
- Oily beans create buildup inside the grinder. This buildup packs grounds together and causes jamming noises.
- Motor bearing issues can make the machine sound rough or shaky. Test the motor shaft for smooth rotation.
- An empty bean container during a grinding cycle often makes the noise louder than normal. Always check your bean levels first.
- Static buildup inside the grinder can also add to strange noises. Proper bean storage helps reduce this problem.
Common Causes of Loud Grinding Noise
Your bean-to-cup grinder makes loud noise for several specific reasons. Understanding these causes helps you fix the problem quickly.
Worn or chipped burrs rank as the top cause. Burrs are the grinding components inside your machine. Over time, they wear down from constant use. When burrs become uneven or develop chips, they no longer grind smoothly. Instead, they create a harsh, grinding sound that gets worse each day.
Foreign objects in the hopper cause sudden loud noises. Small stones hide inside coffee beans sometimes. Plastic bits from packaging can slip in too. When these objects hit the burrs, your grinder makes a sharp, alarming sound. This is actually your machine’s way of telling you something is wrong.
Motor bearing problems produce a rough, shaky grinding noise. Bearings are small metal parts that help the motor spin smoothly. When bearings wear out or get loose, the motor vibrates more than normal. This vibration travels through your entire machine and creates extra noise.
Oily beans create buildup inside your grinder. Some coffee varieties have natural oils on the surface. These oils stick to the burrs and internal parts. Over weeks, this buildup makes grinding less efficient and noisier.
An empty bean container during grinding causes unexpected loudness. When beans run out mid cycle, the burrs spin without anything to grind. This creates a different, often louder sound than normal operation.
Static electricity can also contribute to noise. Dry conditions make static buildup more likely inside the grinder. This static can cause beans to stick together or jam slightly, adding unwanted sounds.
The key is paying attention to when the noise started. Did it happen suddenly or gradually? Sudden loud noises usually mean foreign objects. Gradual increases in noise suggest worn burrs or motor issues. This timing helps you identify the exact problem faster.
How Worn or Damaged Burrs Affect Sound
Worn or damaged burrs create some of the most recognizable loud noises in bean-to-cup grinders. Your grinder has two burrs that work together to crush beans into grounds. When these burrs wear down or chip, they no longer fit together smoothly.
Chipped burrs produce a screeching or grinding sound that stands out from normal operation. The metal surfaces no longer align properly, so beans get crushed unevenly. This friction creates that high-pitched noise you hear. Over time, the chips get worse and the sound becomes louder.
Misaligned burrs cause a similar problem. If the upper burr shifts even slightly, it can rub against the lower burr during operation. This rubbing creates vibration and noise throughout the entire machine. You might notice the sound changes depending on how many beans you grind.
Uneven wear on burrs happens gradually. One side wears faster than the other, especially if you grind beans at the same setting every day. This uneven surface means inconsistent grinding and increased noise as beans bounce around inside the chamber.
The damage compounds over time. Small chips lead to bigger problems. Worn burrs also grind less efficiently, so your machine works harder to process the same amount of beans. This extra effort puts stress on the motor and bearings, which can create additional noise.
To check your burrs, remove the upper burr carefully and inspect both surfaces under good light. Look for visible chips, flat spots, or uneven areas. Run your finger gently across the surface to feel for rough patches. If you spot damage, cleaning alone won’t fix the problem. The burrs need replacement to restore normal grinding performance and eliminate that loud noise.
Regular inspection catches wear early before it becomes severe.
Step-by-Step: Inspecting and Cleaning Your Grinder
Start by unplugging your grinder from the electrical outlet. Safety comes first, and you need the machine completely off before opening any internal parts.
Next, locate the upper burr assembly. Most bean-to-cup grinders have a removable top section. Check your manual for the exact release mechanism, as designs vary. Once you access the upper burr, lift it out carefully and set it on a clean surface.
Inspect both the upper and lower burrs closely. Look for chips, cracks, or uneven surfaces. Hold them up to bright light and rotate them slowly. Chipped edges or flat spots indicate wear. Take photos if you want to compare over time.
Check for debris trapped between the burrs. Use a soft brush to gently remove any grounds or particles. Be careful not to damage the grinding surfaces further.
Now clean all removable parts. Use warm soapy water and a soft cloth to wash the upper burr, lower burr housing, and any other accessible components. Rinse thoroughly and air dry completely before reassembly. Moisture can cause rust and additional noise problems.
While the grinder is open, vacuum out the bean hopper. Foreign objects like small stones or plastic bits hide easily. These create sudden loud noises and can damage burrs. Empty the hopper fully and use a brush to reach corners.
Inspect the motor shaft and bearing area if visible. Spin the shaft by hand (with the grinder unplugged) to feel for smooth rotation. Grinding or resistance indicates bearing wear.
Listen carefully as you reassemble everything. Put components back in reverse order. Plug in the grinder and run a test cycle without beans. The noise level should tell you if cleaning helped or if deeper issues remain.
Checking the Motor and Bearings for Issues
Your motor and bearings work hard every time you grind. When they wear out or develop problems, loud noise is usually the first sign something needs attention.
The motor shaft and bearings sit at the heart of your grinder’s operation. They spin the burrs thousands of times per minute. Over time, friction and heat can damage these parts. A rough or shaky grinding noise often means the bearings are wearing down.
Start by listening carefully to the noise pattern. Does it sound rough and uneven? Does it change speed or intensity? These clues tell you if the motor itself has issues. A healthy motor produces a smooth, consistent sound throughout the grinding cycle.
To inspect the motor area, first unplug your grinder completely. Remove the bean hopper and upper burr assembly. Look inside the motor shaft area if you can access it safely. Check whether the shaft rotates smoothly when you turn it by hand. Any grinding, catching, or resistance suggests bearing trouble.
Foreign debris sometimes gets stuck around the motor shaft. Dust, ground coffee, or bean fragments can jam the mechanism. Use a small brush or vacuum to remove any trapped material around the motor area. Be gentle to avoid damaging internal parts.
Clean the motor housing carefully. Wipe away any oily residue or coffee dust buildup. This helps the motor run cooler and quieter. Let everything dry completely before reassembling.
If the shaft still feels rough or the noise continues after cleaning, the bearings may need professional service. Some grinders have sealed bearings that cannot be replaced at home. In these cases, contact a repair specialist or the manufacturer for support.
Regular cleaning prevents many motor problems. When you maintain your grinder properly, the motor stays healthy and quiet for years.
Preventing Noise Through Proper Bean Storage and Handling
Proper bean storage and handling make a real difference in reducing grinding noise. When you store beans incorrectly, they absorb moisture and develop static buildup. This causes them to clump together and jam inside your grinder’s burrs.
Keep your beans in an airtight container away from direct sunlight and heat sources. A cool, dry place works best. Avoid storing beans in the refrigerator or freezer because temperature changes create condensation. Moisture is your enemy here.
Check your beans before grinding. Look for oily residue on the surface. Oily beans stick together and pack densely in the grinder chamber. This dense packing forces your motor to work harder, which creates louder noise. If your beans feel slick, they may be past their prime.
Remove any visible debris from your bean container. Small stones, plastic pieces, or broken bean fragments can get caught between the burrs. These foreign objects create grinding sounds that seem worse than normal operation. A quick visual inspection takes seconds and prevents real damage.
Handle your beans gently during the transfer process. Rough handling breaks beans into smaller pieces. These fragments fall into tight spaces and jam the grinding mechanism. Pour beans slowly into your hopper rather than dumping them quickly.
Never let your bean container sit empty while the grinder runs. An empty hopper forces the burrs to work against each other with nothing between them. This causes metal on metal contact and produces a loud, concerning noise. Fill your hopper before you start grinding.
Store only a week’s worth of beans at a time. Older beans lose their oils and become dry and brittle. Dry beans break apart more easily during grinding, creating debris that causes noise problems. Fresh beans grind more smoothly and quietly.
Common Mistakes That Lead to Loud Grinding
Many people make simple mistakes that cause their grinder to produce loud, unpleasant noise. Understanding these errors helps you fix the problem quickly.
Using oily beans is one of the biggest culprits. Oily beans stick to the burrs and create friction. This friction produces grinding sounds that are much louder than normal. The oil also causes grounds to pack tightly together. When grounds pack densely, they jam the grinding chamber and make noise worse.
Another common mistake involves ignoring foreign objects in your hopper. Small stones, plastic pieces, or debris slip into bean containers during storage. When these objects hit the burrs, they create sharp, alarming sounds. Always inspect your beans before pouring them into the grinder.
Allowing your bean container to run empty during grinding is surprisingly common. When no beans feed into the burrs, the burrs spin against each other without resistance. This creates a loud, hollow grinding sound. Your grinder works much harder when it has nothing to grind.
Not cleaning trapped grounds regularly causes buildup problems. Old, dried coffee grounds accumulate between the burrs over time. This packed residue blocks smooth burr rotation and increases noise levels. Regular cleaning prevents this issue completely.
Static buildup in your grinder happens more often than you think. Dry conditions cause static electricity to build up around the beans and burrs. This creates crackling or popping sounds during grinding. Moisture control and proper storage reduce static significantly.
Many people overlook the importance of checking their bean quality. Stale or improperly stored beans grind differently than fresh ones. They can cause the grinder to work harder and produce louder noise.
The good news is that most of these mistakes are easy to fix. Simple habits like inspecting beans, cleaning regularly, and storing properly eliminate most loud grinding noise problems.
Troubleshooting: Matching the Noise to the Problem
When your bean to cup grinder makes unusual noise, the sound itself tells you what’s wrong. Different noises point to different problems, so learning to match them helps you fix the issue fast.
Screeching or high pitched sounds usually mean your burrs are damaged. Worn burrs don’t grind evenly, and they rub against each other in the wrong way. Chipped or misaligned burrs create friction that produces that unpleasant screech. If you hear this noise, stop using the grinder right away and inspect the burrs.
Grinding sounds that are noticeably louder than usual often signal an empty bean container. When beans stop flowing into the grinding chamber, the burrs spin without resistance and make more noise. Check if your hopper still has beans before you assume something is broken.
Rattling or clattering sounds tell you something solid is stuck in the hopper. Small stones, plastic pieces, or other debris can fall into your bean container. These foreign objects bounce around during grinding and create a distinctive rattling noise. Stop the machine immediately and empty the hopper to remove any debris.
Grinding sounds mixed with grinding resistance suggest packed or oily grounds jamming the flow. Coffee grounds can compress tightly in the chamber, forcing the motor to work harder. This creates a strained grinding sound that’s different from normal operation.
Grinding sounds that stutter or pause might indicate moisture problems. Humid beans clump together and don’t feed smoothly into the burrs. The grinder struggles to process clumps, so the noise becomes irregular.
Pay attention to when the noise starts. Does it happen at the beginning of grinding or throughout? Does it change depending on how full your bean container is? These details help you identify the exact cause. Once you match your specific noise to the problem, you can take the right fix.
Final Thoughts
A loud grinding noise usually points to a simple problem. Worn burrs, oily beans, or foreign objects often cause the issue.
You can fix most problems at home. Check your burrs first. Look for chips or uneven wear on the surface.
Clean your grinder often. Trapped grounds and oily residue build up over time. This buildup creates friction and noise.
Inspect your bean hopper regularly. Small stones or plastic pieces sometimes end up inside. These foreign objects create loud rattling sounds.
Motor bearing issues need more attention. Check if the motor shaft spins smoothly. Rough rotation signals a bearing problem that needs repair.
Empty bean containers cause unnecessary noise too. Your grinder works harder when no beans feed into the burrs. This creates a louder sound than normal.
Static buildup also plays a role. It affects how grounds move through your grinder. Proper storage helps reduce this issue significantly.
Remember the key connection between noise type and cause. Screeching sounds mean burr or bearing damage. Louder than usual noise means empty containers or debris.
Most noise problems get fixed with basic maintenance. Regular cleaning stops many issues before they start. Inspecting your burrs and hopper takes just a few minutes.
Do not ignore unusual sounds from your grinder. These noises tell you something needs attention. Fixing small problems early prevents bigger issues later.
Your grinder should work quietly most of the time. A well maintained machine grinds smoothly without much sound. Take time each week to check for common problems.
Simple habits make a big difference here. Clean your burrs, store beans properly, and check your hopper often. These steps keep your bean to cup grinder running well for years.
Frequently Asked Questions
What does a screeching noise mean?
A screeching sound tells you your burrs have a problem. They may be worn, chipped, or misaligned. This noise happens when burrs rub together unevenly. Stop using your grinder immediately. Remove the upper burr and inspect it closely. Look for visible chips, flat spots, or uneven wear patterns.
Clean both burrs with a soft brush. Wash all parts in warm soapy water. Air dry completely before reassembling. If screeching continues after cleaning, your burrs likely need replacement.
Why is my grinder louder than normal?
Louder grinding usually means your bean container is empty. When no beans feed into the burrs, they spin freely and create extra noise. Check your hopper before starting a grind cycle.
Foreign objects also cause loud sounds. Inspect your hopper for plastic pieces, stones, or debris. Vacuum the container thoroughly. Oily beans can jam the flow and increase noise too. Switch to fresher beans if you notice sticky residue.
Should I worry about rattling sounds?
Rattling or clattering means something solid is stuck inside. Stop grinding immediately. Remove remaining beans from the hopper. Inspect the entire chamber carefully. You might find a small stone, plastic chip, or hard object.
Clean out the bean container completely. Use a brush to reach corners. Vacuum any remaining debris. Check your beans before refilling. Damaged beans or foreign objects slip into hoppers easily during storage.
How often should I clean my grinder?
Clean your grinder weekly if you use it daily. Remove trapped grounds regularly to prevent buildup. Buildup creates friction and increases noise levels.
Monthly deep cleaning keeps everything running smoothly. Wash burrs, hopper, and chute parts. Air dry all components before reassembling. This simple habit prevents most noise problems before they start.

Hi, I’m Luna! I’m the voice behind CoffeePickster.com. I’m a coffee obsessive who’s spent way too many hours (and dollars) testing coffee makers so you don’t have to. I created this blog to help fellow coffee lovers find the right gear without the guesswork. Let’s brew something great together!