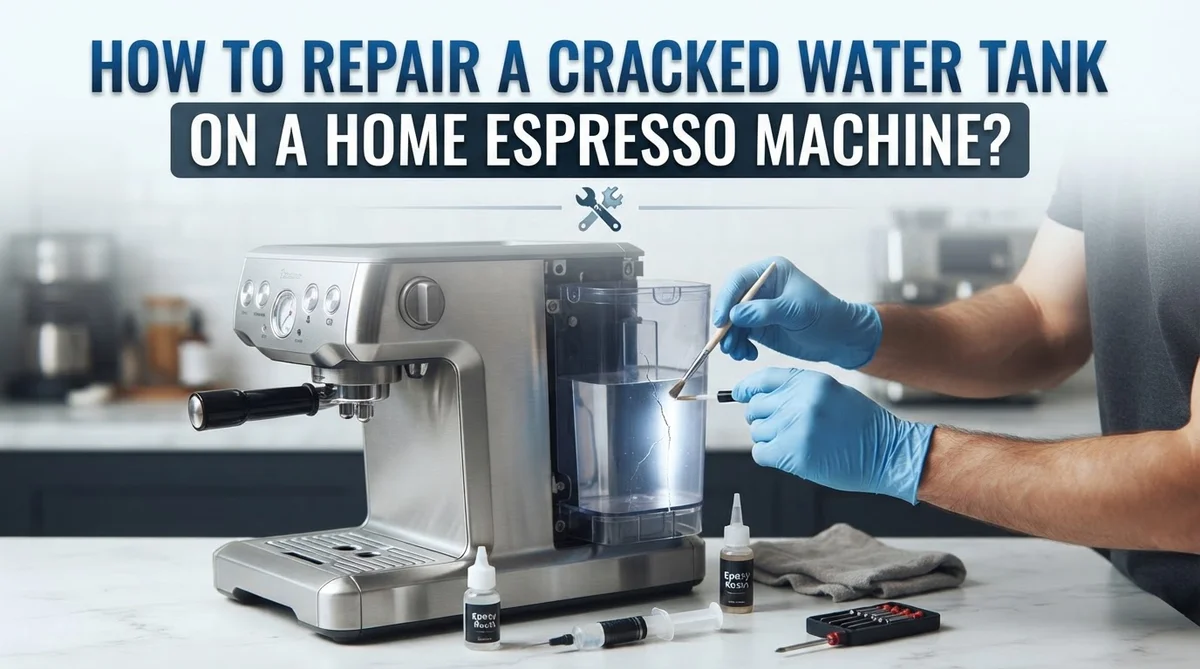
How To Repair A Cracked Water Tank On A Home Espresso Machine?
A cracked water tank can turn your morning coffee routine into a soggy mess. Water pools on your counter. Your machine stops working right. Panic sets in fast.
But here is some good news. You do not need to buy a new espresso machine just because the tank cracked.
Most plastic tanks are fixable at home. All you need is the right glue, some patience, and a few simple steps.
This guide walks you through the entire repair process. We cover cleaning the tank properly before any fix. We show you how to apply adhesive the right way. You will also learn about UV curing methods that make repairs strong and lasting.
In a Nutshell
- Clean first. Wipe the tank with isopropyl alcohol and let it dry fully. Skipping this step causes glue to fail later.
- Glue the crack. Apply a thin layer of UV adhesive directly onto the crack. Do not rush this part.
- Cure with light. Place the tank under direct sunlight or a UV manicure lamp. This hardens the glue and seals the crack tight.
- Check the small parts too. Gaskets, O-rings, and hoses often cause leaks that look like tank problems. Inspect them closely.
- Try a quick fix if needed. A thin rubber band in the O-ring groove can hold you over until a new gasket arrives.
- Test before you trust it. Fill the tank with water and watch for drips. Never skip this final check before putting it back in your machine.
Signs Your Espresso Machine’s Water Tank Is Cracked or Leaking
A cracked water tank shows itself in several ways. The most obvious sign is water pooling under your machine or dripping from the tank itself. You might notice wet spots on your counter after you fill the tank or run a brew cycle.
Pay attention to slow leaks too. Sometimes water seeps out so gradually that you only spot it after several hours. Check the area around your machine’s base regularly. Moisture in unexpected spots often points to a tank problem.
Listen for sounds that seem off. A hissing noise when you attach the tank can mean air is escaping through a crack. This happens because the seal between the tank and machine is broken.
Look for visible cracks on the plastic surface. Run your fingers gently over the tank while it’s empty. Small hairline cracks are easy to miss with your eyes alone. Some cracks appear only on one side, so inspect the entire tank carefully.
Water quality changes can hint at problems too. If your espresso tastes off or looks cloudy, a cracked tank might be letting air enter or allowing debris inside.
Check what’s actually leaking. Is the water coming from the tank itself, or from the connection points? Gaskets and O-rings fail frequently and create leaks that feel like tank cracks. Press gently on the rubber seals around the tank opening. A mushy or cracked gasket needs replacement.
Test the hoses connected to your tank as well. Pinch them gently to feel for soft spots or cracks. Damaged hoses often leak just like cracked tanks do, so ruling them out matters.
Tools and Materials You’ll Need Before Starting
Before you start fixing your espresso machine’s water tank, gather everything you need. Having the right tools and materials nearby saves time and frustration.
Cleaning supplies come first. You need isopropyl alcohol to clean the cracked area. A soft cloth or paper towels work well for wiping. The goal is to remove all dirt, mineral deposits, and oils from the tank surface.
Drying materials are essential. Keep lint free cloths or microfiber towels on hand. The tank must be completely dry before you apply any adhesive. Moisture prevents the glue from bonding properly.
UV adhesive is your main repair tool. This special glue hardens when exposed to ultraviolet light. Make sure you have a UV light source available. Direct sunlight works, or you can use a UV manicure lamp from your bathroom or beauty supplies.
Inspection tools help you spot hidden damage. A flashlight lets you see inside the tank clearly. You should also have a magnifying glass to examine small cracks and weak spots.
Replacement parts matter too. Keep food grade tubing nearby in case hoses need replacing. Have extra silicone gaskets and O rings available. These small parts often cause leaks that seem like tank problems.
Additional supplies round out your kit. Teflon tape helps seal valve threads during reassembly. A small container holds water for testing. A sponge or soft brush cleans hard to reach spots.
Organization helps your workflow. Lay everything on a clean, flat surface before starting. This prevents you from stopping mid repair to search for items. You will work faster and more efficiently when everything sits within arm’s reach.
Step-by-Step Guide to Repairing a Cracked Plastic Water Tank
Start by disconnecting your espresso machine from power. Remove the water tank carefully and place it on a flat, clean surface. Inspect the crack closely with good lighting to understand its size and location.
Pour out any remaining water from the tank into a sink. This step prevents messy spills during the repair process. Shake the tank gently to remove excess moisture from inside.
Wipe the cracked area thoroughly with a lint free cloth. Use isopropyl alcohol on the cloth to clean both the inside and outside of the crack. Alcohol removes mineral deposits, oils, and residue that prevent adhesive from bonding properly.
Let the tank dry completely. This usually takes 15 to 20 minutes in a warm room. You can speed this up by placing the tank in direct sunlight or near a fan. Complete drying is critical because water interferes with UV adhesive curing.
Apply the UV adhesive carefully into the crack. Use a small applicator or stick to work the glue deep into the damaged area. Avoid using too much adhesive, as excess glue creates messy overflow.
Position the tank under direct sunlight or use a UV manicure lamp to cure the adhesive. Most UV adhesives harden within 5 to 10 minutes under strong light. Check your specific adhesive instructions for exact timing.
Allow the tank to cool slightly after curing. The plastic may feel warm from the UV light exposure. Wait at least 30 minutes before handling the tank roughly or filling it with water.
Inspect your repair work carefully. Look for any remaining gaps or weak spots in the adhesive line. If needed, apply a second coat of adhesive to ensure a strong seal.
Inspecting and Fixing Gaskets, O-Rings, and Seals
Gaskets and O-rings are rubber seals that stop water from leaking out of your espresso machine’s tank. These small parts fail often and create leaks that feel like tank cracks. Learning to inspect and fix them saves you money and keeps your machine working.
Start by removing the water tank from your espresso machine. Look at the base where the tank connects to the machine. You will see rubber rings sitting in grooves. These are your gaskets and O-rings. Check each one carefully for cracks, tears, or flat spots.
Damaged seals look compressed or hard. Squeeze them gently with your fingers. A healthy O-ring bounces back. A worn one stays flat. If you see cracks or discoloration, the seal needs replacing soon.
Misalignment causes leaks too. The O-ring must sit straight in its groove. Remove it and clean the groove with isopropyl alcohol. Dry it completely. Place the O-ring back in position. Make sure it sits flat all the way around.
Need a quick fix while waiting for replacement parts? A thin rubber band placed in the O-ring groove works temporarily. Wrap it around the groove carefully. This holds pressure until your new gasket arrives.
When reassembling, check all valve threads. Wrap Teflon tape around the threads before tightening. This prevents leaks at connection points.
Test your work before using the machine. Fill the tank with water and watch for drips at the base. Let it sit for five minutes. Check for moisture around the seals. No water means your repair worked. Dry spots mean you need to replace the gasket or O-ring soon.
Checking Hoses and Valves for Secondary Damage
When you repair a cracked water tank, checking hoses and valves for secondary damage is absolutely critical. Many people fix the crack and miss other problems that cause leaks later.
Start by visually inspecting every hose connected to your tank. Look for cracks, splits, or soft spots along the entire length. Squeeze each hose gently with your fingers. A healthy hose feels firm and bounces back. A damaged hose feels mushy or leaves an indent.
Pay special attention to hose connections at both ends. These areas experience the most stress. If a hose looks worn or discolored, it likely needs replacement. Use food grade tubing as your replacement material since it contacts drinking water.
Next, examine all valves on your machine. Remove each valve carefully and inspect the threads. Debris or mineral buildup often accumulates here and causes leaks. Clean the threads thoroughly with a soft cloth.
When you reassemble valves, wrap Teflon tape around the threads before retightening. This creates a watertight seal. Wrap the tape clockwise around the threads three to four times.
Check where hoses connect to valves. These connection points frequently leak when seals wear out. Tighten any loose fittings by hand first. If leaking continues, the seal needs replacement.
Fill your tank with water and observe the repaired area for at least five minutes. Watch the base of the tank and all valve connections. Any drips mean additional repairs are needed.
This inspection step prevents frustration later. Many people think their repair failed when actually a separate hose or valve caused the leak. Taking time to check everything now saves you from repeated troubleshooting sessions.
Testing the Repaired Tank Before Reinstallation
Before you reinstall your water tank, testing it properly saves you from future headaches. This step confirms your repair actually works.
Fill the tank with clean water at your sink. Pour water slowly until the tank reaches its normal capacity. Watch the repaired crack area closely for any drips or seeping. Water should stay inside the tank completely.
Let the filled tank sit for at least five minutes. Sometimes small leaks take a moment to appear. Check the crack again after this waiting period. Look at the base where the tank connects to your machine too. Leaks often show up at connection points rather than the crack itself.
Inspect the entire tank surface while it’s full. Tilt it gently side to side to test different angles. Water pressure changes when you move the tank, which reveals weak spots in your repair.
Pay close attention to where hoses attach to the tank. These connection points experience stress during normal use. A leak here means your repair held but a gasket needs attention instead.
Empty the tank completely over a sink once testing finishes. Dry the exterior with a clean cloth. Look for any water residue that might indicate seeping you missed.
If you spot leaks, don’t reinstall yet. Let the adhesive cure longer under UV light. Sometimes additional curing time strengthens the bond. If leaks persist after proper curing, the crack may be too large for this repair method.
Only reinstall your tank when testing shows zero leaks. This careful approach means your espresso machine works reliably without water damage to internal components.
Common Mistakes That Cause Repairs to Fail
Many repairs fail because people skip critical preparation steps. The most common mistake is applying adhesive to a wet or damp tank. Water prevents the UV glue from bonding properly. You must dry your tank completely with a clean cloth. Even small moisture spots will cause the repair to fail within days.
Another frequent error is using the wrong cleaning method before gluing. Dirt, mineral deposits, and old sealant residue block adhesive contact. Clean your tank thoroughly with isopropyl alcohol. Let it air dry for at least 15 minutes after cleaning.
People often forget to inspect hoses during tank repair. A cracked hose can make you think your tank repair failed when the actual problem is elsewhere. Check every hose connected to your machine. Look for splits, cracks, or soft spots along the entire length.
Rushing the UV curing process causes weak bonds. Some folks apply glue and immediately test their tank. The adhesive needs full exposure to UV light. Use direct sunlight or a UV manicure lamp for the recommended time. This step cannot be shortened.
Testing mistakes also derail repairs. Filling the tank and immediately reinstalling it leaves you vulnerable. Let the filled tank sit for five minutes minimum. Watch carefully for any leaks at the crack location and all connection points.
Finally, ignoring valve maintenance creates false repair failures. When you reassemble your machine, valve threads must be wrapped with Teflon tape. This prevents water from leaking around the valve stem. Skipping this step makes people blame the tank repair when the real issue is the valve.
Troubleshooting Persistent Leaks After Repair
When your repaired water tank still leaks after you’ve completed the repair process, the problem usually isn’t the crack itself. Instead, persistent leaks come from gaskets, seals, or connection points that you may have overlooked.
Start by checking if water drips from the base of the tank where it connects to your machine. This typically indicates a gasket alignment issue. Remove the tank and inspect the rubber gasket underneath. Look for cracks, deformation, or debris stuck on the surface. Clean the gasket thoroughly and check that it sits evenly in its groove before reinstalling.
Next, examine every hose connection point on your tank. Leaks often occur at these stress zones rather than at the repaired crack itself. Gently squeeze each hose to feel for soft spots or cracks you might have missed. If a hose feels compromised, that’s your culprit. Replace it with food-grade tubing that matches the original diameter.
Don’t overlook valve threads during troubleshooting. Remove each valve and inspect the threads for corrosion or damage. Apply fresh Teflon tape around the threads before retightening. A loose valve connection causes slow drips that seem like tank failure.
Finally, repeat your water test with fresh eyes. Fill the tank and place it in a dry sink or tray. Watch for thirty minutes instead of five. Sometimes leaks appear slowly. If water still drips after checking gaskets, hoses, and valves, your original crack repair may need redoing. Clean the area again and reapply UV-cured adhesive using proper technique.
Final Thoughts
Repairing a cracked water tank does not have to feel impossible. With patience and the right steps, you can fix the crack yourself at home. This saves money and keeps your espresso machine running smoothly.
Cleaning the tank properly makes a huge difference in how well the glue bonds. Skipping this step often leads to weak repairs that fail quickly. Always take time to dry the tank fully before you apply any adhesive.
UV cured glue works well for plastic tanks because it creates a strong, lasting bond. Direct sunlight or a UV lamp both get the job done. Just remember that patience matters here too.
Gaskets and O-rings play a bigger role than most people realize. A cracked tank might not be your only problem. Check these small parts whenever you notice leaks, even after a successful repair.
Hoses deserve attention as well. Old or damaged tubing can cause leaks that have nothing to do with your tank. Replace worn hoses with food grade tubing to avoid future issues.
Valve threads sometimes get overlooked during reassembly. A little Teflon tape goes a long way in preventing leaks at these connection points. This small step often makes a big difference.
Repairing a water tank teaches you more about how your espresso machine works overall. You start noticing small issues before they become big problems. This knowledge helps you maintain your machine better over time.
Stay calm and methodical during every step of the repair. Rushing leads to mistakes that cost you more time later. A careful approach gets you back to brewing coffee sooner rather than later.
Frequently Asked Questions
Can I use regular super glue to fix my water tank crack?
Regular super glue doesn’t work well for water tank repairs. UV-cured adhesive is better because it creates a stronger, more reliable bond that resists moisture. Super glue can fail when exposed to constant water contact. UV-cured options cure when exposed to sunlight or a UV lamp, making them ideal for this job.
What should I do if my tank leaks after the repair is complete?
The leak usually isn’t from the crack itself. Check where the base of the tank connects to your machine first. Water often drips from gasket misalignment rather than from your repair work.
Next, inspect every hose connection point carefully. Look at valve threads too, as they sometimes get overlooked. Repeat your water test to confirm where the leak originates.
How long should I let the UV glue cure before using my machine?
Most UV-cured adhesives set within minutes under direct UV light. However, wait at least 24 hours before reinstalling your tank and running water through it. This extra time allows the bond to fully strengthen and prevents premature failure.
What’s a quick temporary fix if my tank is leaking right now?
Place a thin rubber band in the O-ring groove as a short-term solution. This won’t fix the underlying problem, but it buys you time while you order a replacement gasket or schedule a proper repair.
This temporary fix only works for gasket issues, not for actual cracks in the tank itself.
Should I replace my hoses while repairing the tank?
Inspect all hoses during your repair process. If you spot cracks, bulges, or discoloration, replace them with food-grade tubing. Damaged hoses often cause leaks that people mistakenly blame on the tank crack itself.

Hi, I’m Luna! I’m the voice behind CoffeePickster.com. I’m a coffee obsessive who’s spent way too many hours (and dollars) testing coffee makers so you don’t have to. I created this blog to help fellow coffee lovers find the right gear without the guesswork. Let’s brew something great together!